Last updated October 31, 2026
Attic Insulation Troubleshooting: Common Problems and How to Fix Them
Most attic insulation failures have nothing to do with the R-value printed on the bag. We’ve pulled back enough insulation in Rancho Santa Margarita attics to know the truth: the batts weren’t installed wrong because someone was lazy. They were installed wrong because nobody understood how air actually moves through a house. Our Complete Attic Insulation Guide for Rancho Santa Margarita Homeowners will teach you to see your attic the way a building scientist does. You will learn how to diagnose the four symptom categories we see most often, perform two simple tests without buying a single tool, and understand which fixes are permanent and which are just expensive patches. By the end, you’ll know exactly what to ask any contractor before they blow a single bag of fiberglass.
Quick Answer
Attic insulation problems are almost always caused by air leaks, moisture, or installation failure, not by the R-value of the material itself. The fix starts with diagnosing the root cause: check for gaps around recessed lights and HVAC chases, look for moisture staining or compressed insulation, and measure settled depth before adding anything on top. If the original install failed, adding more insulation without fixing the air seal will not solve your comfort or energy problem.
Table of Contents
- The Four Symptom Categories and What They Actually Diagnose
- Two Tool-Free Tests You Can Do This Weekend
- The Real Culprits: Recessed Lights and HVAC Chases
- When Settling Is Normal and When It Is a Red Flag
- The One Situation Where Removal Is Mandatory
- Why the Material Matters More Than the R-Value
- What You Can Fix Yourself and What You Shouldn’t
- Common Mistakes to Avoid
- When to Call a Professional
- Frequently Asked Questions
- The Bottom Line
The Four Symptom Categories and What They Actually Diagnose
When a homeowner in Rancho Santa Margarita calls us about attic insulation, the complaint usually falls into one of four buckets. Each bucket points to a different underlying cause. Treating the symptom without understanding the cause is how people end up with R-60 attics that still make their second floor feel like a sauna in August.
Symptom 1: A Hot Second Floor
Your downstairs feels fine, but the upstairs bedrooms are consistently 8 to 10 degrees warmer every afternoon. Most people assume this means they don’t have enough insulation. In our experience, that’s wrong about 70 percent of the time. What you usually have is an air bypass. Warm air from the living space rises through gaps around light fixtures, plumbing penetrations, and interior wall top plates, then pulls conditioned air out of the house. The insulation is sitting there doing its job, but the air isn’t staying in the house long enough for the insulation to matter. Adding more insulation on top of an air bypass is like piling blankets on a broken window. You’ll spend the money and still be uncomfortable.
The fix starts with air sealing, not with adding R-value. We’ve worked on homes in Rancho Santa Margarita where the attic had R-38 fiberglass batts and a 12-degree temperature differential between floors. The problem wasn’t the batts. The problem was a dozen unsealed can light housings and an HVAC chase that was wide open to the attic.
Symptom 2: High Bills Despite “New” Insulation
You moved into a house that was insulated five years ago, or you had insulation added when you bought the place, and your energy bills haven’t dropped. This is one of the most frustrating situations we see. You did the right thing, spent the money, and got nothing back. In almost every case, the original contractor failed to air seal before insulating. They blew fiberglass or installed batts right over holes in the ceiling plane, gaps around exhaust fans, and open soffit areas. The insulation looks fine from the hatch. It isn’t fine. Air is moving through it like it isn’t even there.
Another cause we see regularly in tract homes built in the 1980s and 1990s: the attic has R-19 installed between ceiling joists, but the joists themselves are uncovered. Wood has an R-value of about 1.1 per inch. A 2×8 joist is a thermal bridge that lets heat pour through the ceiling. If the insulation stops at the top of the joists, about 10 percent of your ceiling area has almost no insulating value at all.
Symptom 3: A Musty Smell in the Hallway or Ceilings
Musty smells in the living space usually point to moisture in the attic, not moisture in the room itself. Warm air rises into the attic through bypasses and carries moisture with it. In a coastal climate like southern California’s, that moisture condenses on the underside of the roof sheathing at night. It drips onto the insulation, which soaks it up like a sponge. Fiberglass does not dry quickly once it gets wet. Cellulose is even slower. The result is a smell that comes and goes with the weather and gets worse during periods of marine layer.
We’ve seen this in Rancho Santa Margarita homes where the bathroom exhaust fans vent directly into the attic instead of through the roof. Every shower pumps warm, humid air into the insulation. Within a season, the insulation is matted down, has lost most of its loft, and is growing mold. The fix requires removing the affected insulation, fixing the venting, and then re-insulating with dry material.
Symptom 4: Moisture Staining That Looks Like Ice Dam Damage
In cold climates, ice dams cause water stains along exterior walls. In a warm climate like Rancho Santa Margarita, those same stains have a different cause and a different diagnosis. What looks like ice dam staining around ceiling edges is usually either condensation or a roof leak. Condensation staining is diffuse, wide, and often appears as a shadow around the entire perimeter of a room. A roof leak is localized, darker, and follows a specific path.
Condensation at the ceiling perimeter happens when warm air from the house hits cold surfaces near the eaves where insulation coverage is thin. In Rancho Santa Margarita, this shows up most often in winter when nighttime temperatures drop into the 30s. The fix is to seal the perimeter air leaks and ensure insulation covers the exterior wall top plates completely. Adding insulation without sealing the leaks first will often make the condensation worse, because the insulation holds the moisture against the cold surface longer.
Two Tool-Free Tests You Can Do This Weekend
You don’t need a thermal camera or a blower door test to confirm whether your attic has serious air bypass problems. Two simple tests will tell you more than most insulation salespeople will.
The Dollar-Bill Test
- Close all windows and exterior doors in your house.
- Turn on every exhaust fan: bathroom fans, kitchen range hood, laundry fan if you have one.
- Open one door or window about an inch.
- Go to the attic hatch or pull-down stairs, if you have them.
- Hold a dollar bill near the edges of the hatch frame.
If the bill moves, your attic is pulling air from the house. That means the conditioned air you paid to cool or heat is actively leaving your home through the attic boundary. This is a definitive sign that air sealing is needed before any additional insulation will matter. We’ve done this test in Rancho Santa Margarita homes and seen dollar bills bend almost in half at the attic hatch frame.
The Thermal Bypass Check
- Wait for a day with a noticeable temperature difference between inside and outside. In summer, late afternoon works best.
- Place your hand flat on the ceiling in the center of a room, then move it slowly toward the perimeter.
- Repeat this in every upstairs room, especially near closets, bathrooms, and hallways.
- Note any spots where the ceiling feels noticeably warmer or cooler than the surrounding area.
Warm spots or cool bands around the perimeter of a room usually mean the exterior wall top plates are not covered with insulation. In tract homes around Rancho Santa Margarita, this is extraordinarily common. The builder installed insulation between the ceiling joists but never covered the joists or the wall plates. That band of warmer ceiling is a direct thermal bridge to the attic. No amount of added insulation in the center of the attic will fix it because the heat is bypassing the insulation through the wood framing.
The Real Culprits: Recessed Lights and HVAC Chases
If you have recessed can lights in your ceiling, you almost certainly have air leakage at every single fixture. Non-IC-rated can lights from before about 2005 have open vents that allow heat to escape into the attic. Even newer IC-rated fixtures have gaps around the housing where it meets the drywall. In a typical 2,000-square-foot Rancho Santa Margarita home with 12 to 20 can lights, the cumulative air leakage through these fixtures can equal leaving a small window open year-round.
The proper fix for can lights is to replace non-IC-rated fixtures with sealed, insulation-contact-rated LED units and to air seal around every housing from the attic side. The patch fix, which some contractors still do, is to leave the old fixture in place and pile loose insulation around it. That does nothing for the air leak and creates a fire hazard if the fixture isn’t rated for insulation contact.
HVAC chases are the second major bypass we find. A chase is the enclosed vertical shaft where ductwork runs from the attic down through the living space. Builders rarely seal the top or bottom of these shafts. The result is a direct chimney from the attic into your living room, kitchen, or hallway. We’ve pulled back the insulation around HVAC chases in Rancho Santa Margarita homes and found gaps you could drop a phone through. Sealing these chases with foam board and can foam is straightforward, but it requires working in the attic and understanding how the chase connects to the rest of the framing.
Both of these fixes are part of what makes the difference between an insulation job that works and one that doesn’t. A contractor who only blows insulation and never looks at the bypasses is selling you a partial fix. We only do insulation, which means we do it better, and that includes sealing the leaks that make the insulation worth installing in the first place.
When Settling Is Normal and When It Is a Red Flag
Blown-in insulation settles over time. Loose-fill fiberglass settles about 5 to 10 percent in the first year or two, then stabilizes. Cellulose settles 15 to 20 percent and should be installed at a higher initial depth to account for that. If your blown-in fiberglass was installed at 14 inches in a Rancho Santa Margarita attic ten years ago, it’s probably sitting at 12 to 13 inches now. That’s normal. You’ve lost a little R-value, but not enough to justify a full re-blow.
What’s not normal is insulation that has settled by 40 percent or more. Here’s how to tell the difference:
- Expected settling: Uniform depth across the attic floor, fluffy texture, insulation springs back slightly when compressed.
- Moisture compression: Uneven depth, flat or matted appearance, insulation stays compressed when you press it, and there may be visible gray or dark patches.
- Rodent compression: Tunnels or paths through the insulation, flattened areas near walls, and droppings mixed into the material.
If your blown-in fiberglass measured 10 inches when installed and now measures 6 inches in places while other spots are still 9 or 10, something is compressing it. Moisture is the usual cause in Rancho Santa Margarita: condensation from air leaks, a roof leak, or a bathroom fan venting into the attic. Rodent activity is less common but we do see it. Both require more than just topping off the insulation. You have to fix the moisture source or remove the rodents first. Otherwise, the new insulation will end up exactly where the old insulation did: flat, moldy, and ineffective.
Depth measurements are worth doing yourself before you let anyone quote you a re-blow. A simple yardstick pushed down to the drywall in several spots will tell you what you’re working with. In attics with fiberglass batts, check whether the batts are lying flat against the ceiling or have gaps at the edges. Gaps of even half an inch around every batt add up to a lot of air movement.
The One Situation Where Removal Is Mandatory
There are two scenarios where adding insulation on top of the existing material is not just wrong, it’s counterproductive. The first is confirmed rodent activity. The second is confirmed moisture damage. In both cases, the existing insulation must be removed before new material goes in.
Rodent-contaminated insulation is a health and performance problem. Rodent urine and droppings contaminate the material. Tunneling compresses it to the point where it provides almost no thermal resistance. Rodents also chew through wiring, which creates a fire hazard. Blowing new insulation over a rodent-infested attic buries the problem and makes future inspections harder. It also fails to address the reason the rodents got in, which is usually a hole somewhere in the attic boundary. Most insulation manufacturers will void their warranty on material installed over known rodent contamination.
Moisture-damaged insulation is a similar situation. Wet fiberglass loses its loft and never regains full insulating value after drying. Wet cellulose clumps, settles, and can become a substrate for mold. If the material was soaked by a roof leak or by a bathroom fan venting into the attic, removing the damaged section is mandatory before re-insulating. In Rancho Santa Margarita, we see this most often in homes where the original owner ran a bathroom fan or a dryer vent into the attic because the builder didn’t install proper roof penetrations. The fix involves removing the damaged insulation, sanitizing the area, installing proper venting, and then re-insulating with dry material.
Skipping the removal step voids most manufacturer warranties and leaves you with an attic that still smells, still underperforms, and still holds moisture against your ceiling. Any contractor who says otherwise is not doing you a favor.
Why the Material Matters More Than the R-Value
R-value is a measure of resistance to heat flow. It’s not a measure of air leakage, moisture performance, or install quality. Two attics can both be labeled R-38 and perform completely differently. One is tight and comfortable. The other leaks like a screen door. The difference is usually the material choice and the installation quality, not the number on the bag.
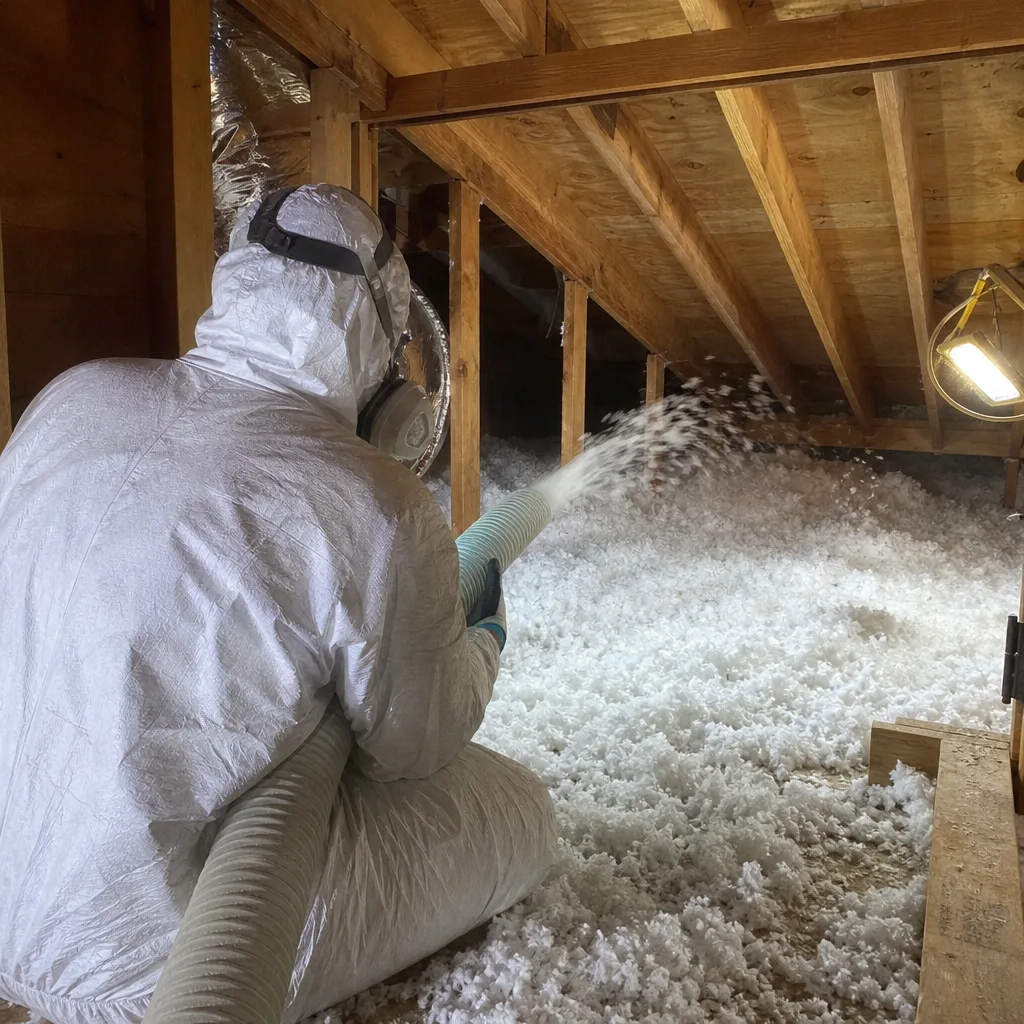
In a hot, dry climate like inland southern California, different materials behave differently in real attics. Fiberglass batts, installed carefully and paired with proper air sealing, work well and are cost-effective. Blown-in fiberglass, like products from Orange County Insulation‘s line including Owens Corning and Johns Manville, is excellent for attics with irregular joist spacing or lots of obstructions. Cellulose, like GreenFiber, provides superior air flow resistance because it’s denser than fiberglass and fills small gaps more effectively. Spray foam, whether open-cell from Icynene or closed-cell from Demilec, creates an air seal and insulation in one step, which is why it’s often the right choice for attics with complex rooflines or ducts in the attic space.
We carry all of these options because we only do insulation. A general contractor who installs insulation on the side usually has one product line from one supplier. That means the job gets matched to the product they can get, not the product that matches your attic. When we walk an attic in Rancho Santa Margarita, we’re looking at the framing, the existing condition, the moisture profile, the duct layout, and the homeowner’s comfort goals. Then we pick the material that fits. That’s the whole point of having eight major manufacturer brands available: Owens Corning, Johns Manville, Knauf, Rockwool, CertainTeed, Icynene, Demilec, and GreenFiber. The right material for your home, not the easiest one for us to install.
What You Can Fix Yourself and What You Shouldn’t
Some attic insulation fixes are genuinely DIY-friendly. Others require professional equipment, training, and safety gear. Knowing the difference will save you money and keep you out of the emergency room.
Reasonable DIY Fixes
- Air sealing the attic hatch: Weatherstripping around the hatch frame and adding a foam board panel to the back of the hatch door is straightforward and effective. This is one of the highest-value fixes per dollar spent in any attic.
- Caulking visible gaps in the attic floor: If you can see daylight or feel air moving around plumbing pipes, electrical penetrations, or ceiling boxes, a tube of caulk or a can of foam is the right fix. Do this before adding insulation.
- Replacing old weatherstripping on the attic access: The gasket on pull-down stairs wears out. Replacement kits are cheap and install in under an hour.
- Adding batt insulation in an open, unfinished attic: If your attic is open, dry, and you have unlimited headroom and reasonable heat tolerance, you can lay batts. You will still need a good mask, gloves, and knee boards. This is not a casual weekend project in a Rancho Santa Margarita summer, when attic temperatures routinely hit 140 degrees.
Jobs for a Professional
- Spray foam application: The chemistry is exothermic and unforgiving. Open-cell and closed-cell foams require precise mixing, temperature control, and application technique. A bad DIY foam job is expensive to fix and can create off-gassing problems.
- Removing contaminated or moldy insulation: This requires HEPA vacuums, proper containment, and respirators. Disturbing moldy insulation without containment spreads spores through the house.
- Working in a cramped, low-slope attic: If you can’t stand up or kneel safely in the space, or if you have any question about whether the ceiling structure can support your weight, do not get in there. The risk of falling through the ceiling is real and the repair is expensive.
- Air sealing a large, complex attic: Sealing can lights, HVAC chases, and top plates properly takes time, foam, and patience. The marginal cost of professional air sealing is usually offset by the fact that the job gets done thoroughly and you never have to go back in.
Attics in Rancho Santa Margarita reach temperatures that are genuinely dangerous for someone who isn’t accustomed to working in them. Heat exhaustion sets in faster than most people expect. If you’re not sure you can handle the physical demands, you’re not being cautious; you’re being honest. Call a professional before you’re halfway through the job and realize you can’t finish it.
Common Mistakes to Avoid
- Adding insulation without air sealing first. This is the single most common mistake we see in Rancho Santa Margarita attics. The insulation goes on top of open bypasses and the homeowner sees no change in comfort or bills. Then they blame the insulation, when the insulation was never the issue.
- Blocking soffit vents with new insulation. If your attic has soffit vents and you push insulation all the way to the eaves, you cut off the airflow that keeps the attic dry. Use baffles or leave the vents clear. A hot, stagnant attic will cook your roof from underneath and make the living space hotter.
- Venting a bathroom fan into the attic. This is a code violation, a moisture problem, and a mold factory, all in one. The fan must vent through the roof or out a gable wall. We see this constantly in older Rancho Santa Margarita homes.
- Assuming R-value is the whole story. R-60 over open air bypasses performs worse than R-30 in a properly sealed attic. The number matters, but the seal matters more.
- Covering recessed can lights with loose fill. Non-IC-rated fixtures can overheat and start a fire when buried in insulation. IC-rated fixtures are safe to cover, but old fixtures should be replaced or sealed from the attic side before insulation is added.
- Buying the cheapest quote without understanding what’s included. A low bid that skips air sealing, doesn’t include removal of damaged material, and uses the thinnest legal R-value is not a deal. In most cases, you’ll pay to fix it within five years.
When to Call a Professional
Call a professional Attic Insulation services provider if you’ve done the dollar-bill test and confirmed air movement at the hatch or if you’ve found evidence of moisture, mold, or rodent activity in your attic. Call before you add insulation if your existing material is compressed, stained, or smells. Call if you have ducts in the attic or recessed lights that need sealing. These are not diagnostic problems you should guess at, because the guessing gets expensive.
Orange County Insulation offers free estimates in Rancho Santa Margarita. We’ll walk your attic with you, show you what we’re seeing, and give you an honest recommendation based on evidence, not on a sales script. Call (877) 680-3557 to schedule a visit.
Frequently Asked Questions
Your attic insulation is bad if you have evidence of air movement at the attic hatch or around ceiling fixtures, if the material is compressed, wet, or moldy, or if you’re seeing temperature differences between rooms that can’t be explained by duct balancing. Use the dollar-bill test and the thermal bypass check described above. If those tests show problems, the insulation is not doing its job regardless of how it looks. Call (877) 680-3557 for a free attic evaluation.
Adding insulation on top of existing material is almost always cheaper than removal and replacement, but it’s only the right choice when the existing material is dry, uncompressed, and free of contamination. If moisture or rodent damage is present, you’ll pay more later to fix what you buried. A proper evaluation tells you which path you’re on. Estimates are free from Orange County Insulation.
Yes, if the old insulation is dry, uncontaminated, and not compressed by moisture or rodents. You can blow loose-fill fiberglass or cellulose over existing batts or loose fill. What you cannot do is skip the air sealing step. New insulation over open bypasses will not fix your comfort problem. Air seal first, then add insulation on top.
Attic insulation costs in Rancho Santa Margarita typically range from $1.50 to $4.50 per square foot depending on the material, the R-value target, and whether air sealing is included. Blown-in fiberglass or cellulose is usually on the lower end. Spray foam runs higher. Contact Orange County Insulation at (877) 680-3557 for a specific quote on your attic.
For most homes in Rancho Santa Margarita and the surrounding area, the practical target is R-38 to R-49, depending on whether your ducts run through the attic and how much of the year you run air conditioning. Homes with attic ductwork benefit from higher R-values and from sealing the ductwork itself. We recommend an evaluation of your specific attic before settling on a number.
Spray foam done correctly does not cause moisture problems. The issue arises when closed-cell foam is installed over a roof deck that already has a leak, or when the foam is applied over damp sheathing. In open attics where ducts run through the space, spray foam on the roofline moves the building envelope from the ceiling to the roof, which can improve duct efficiency significantly. The key is making sure the roof is sound before the foam goes on. That’s why we evaluate moisture conditions before recommending spray foam from Icynene or Demilec in any Rancho Santa Margarita attic.
The Bottom Line
Attic insulation troubleshooting is not about finding a bigger R-value. It’s about finding out why the R-value you already have isn’t performing. Air leaks, moisture, compression, and installation shortcuts are the real problems in most Rancho Santa Margarita attics. Fix those first. Then, and only then, add insulation if the depth measurement says you need it. If you’re not sure what you’re looking at, or if the dollar-bill test confirmed air movement, explore our more guides & resources or call us. We only do insulation, which means we do it better. Free estimates at (877) 680-3557.
Written by the team at Orange County Insulation, serving Rancho Santa Margarita since 2013.